Paint thinner is a broad term defining numerous solvents designed to thin or remove paint from brushes, rollers, and other tools. Examples of paint thinners include turpentine, acetone, naphtha, mineral spirits, toluene, lacquer thinner, alcohol, and xylene.
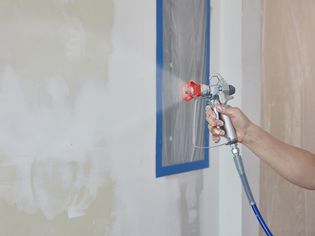
These powerful solvents break down oil-based paints, primers, and stains, making it easier to strip paint, clean tools, and thin paint to fill a paint sprayer. Learn how to use paint thinner effectively for your projects.
Safety Considerations
Most paint thinner products contain powerful chemicals hazardous to the user's nose, mouth, throat, lungs, eyes, and skin. Always work in a well-ventilated space to avoid the build-up of dangerous fumes. Wear appropriate safety equipment, including breathing protection, gloves, a long-sleeve shirt, long pants, closed-toe shoes, and safety goggles with a rubber seal to prevent eye irritation. Paint thinner is flammable, so do not work near any flame or heat source. Store paint thinner and used rags in a fireproof container.
How to Use Paint Thinner to Clean Painting Tools
-
Fill a Container With Paint Thinner
Get a bucket or small container to hold the paint thinner so it's easy to dip paintbrushes, paint rollers, and rags. Do not use a plastic container, because the paint thinner may destroy the plastic and leak through the container.
-
Clean Paintbrushes and Paint Rollers
Place the brushes and rollers into the container with the paint thinner. Move the paint brushes around in the thinner for about 30 seconds to break down the paint. Remove the tools and clean them with warm, soapy water to remove the paint-thinner residue, then rinse and dry.
-
Clean Paint Cans, Paint Trays, and Other Objects
Use a dry cloth or rag to clean up a mess on the sides of paint cans, in the bottom of the paint tray, or on any other objects that are safe for use with paint thinner, but cannot fit inside the container.
How to Use Paint Thinner to Strip Paint
-
Choose the Correct Paint Thinner for the Material
Find the correct paint thinner for the intended use. There are options formulated specifically for hardwood, drywall, aluminum, steel, and more. However, you will likely need a paint stripper product for thorough removal from a surface if the paint is old and dried.
-
Apply Paint Thinner
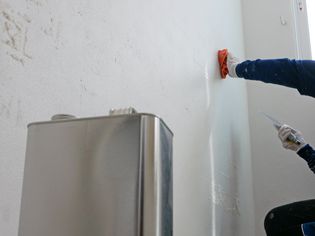
Use an inexpensive paintbrush to apply a thin layer of paint thinner to a small section of the wall, ceiling, or any other surface. Check the manufacturer's directions for how long the paint thinner should sit on the surface. It typically takes about 20 minutes for the paint to soften.
-
Remove the Paint
Use a plastic paint scraper to scrape the paint off the surface. If all the paint does not come off with the plastic scraper, apply additional paint thinner or use a paint stripper. However, do not use too much paint thinner because it can seep into porous materials, like wood.
-
Clean off the Paint Thinner
Wipe down the area where the paint thinner was applied using clean water and a cloth or rag. This step helps to protect the wood or metal surface and prepare it for repainting.
How to Use Paint Thinner to Thin Paint
-
Choose an Appropriate Paint Thinner
Pick the appropriate thinner for your type of paint. Check the manufacturer's label for the right selection. In general, select the following:
- Oil-based thinner, such as turpentine or mineral spirits, for oil-based paints, varnishes, and stains
- Lacquer thinner for lacquer paint
- Denatured alcohol for shellac
- Water for thinning latex paint (chemical paint thinner causes latex paint to separate and become unusable)
-
Measure and Mix the Paint Thinner
Mix the paint thinner with room-temperature paint (cold paint appears thicker than it is). Use a 3:1 or 4:1 ratio of paint to paint thinner. An incorrect ratio may ruin the paint. However, always refer to the manufacturer's recommendations for the right mixture. Start with a small batch until you are happy with the mixture.
-
Test the Mixture
Apply a small amount of paint to the desired surface or load it into a paint sprayer to test the viscosity, appearance, and adhesion. The paint should completely cover the surface and not run or drip excessively. If the paint still seems too thick, add small amounts of paint thinner and repeat the test until you are satisfied with the results.
Storing Paint Thinner
- Store paint thinner in a sealed, fireproof container, such as one made of metal, until it can be brought to a hazardous waste collection site.
- Put rags used with paint thinner in a sealed, fireproof container, fill it with water, and dispose of it at a hazardous waste collection site.
- Place the container in a cool, dry location, such as a basement, workshop, garage, or shed.
- Refer to the manufacturer's directions for the ideal storage temperature. The storage area should remain cool during the summer months.
- Avoid storing paint thinner in an area with high temperatures which can cause evaporation, explosion, or spontaneously catching fire.
- Should I mix paint thinner with water?
No, it is unnecessary to mix water into paint thinner.
How long does paint thinner take to dry?Paint thinner typically evaporates versus drying. Evaporation takes a few hours or days, depending on humidity, how much is used, and other factors. Check the product's label for more accurate evaporation times.
What's the difference between paint thinner and paint remover?Paint thinner is not usually used to remove dried or cured paint but can be used to remove damp paint or stains. To completely remove dry paint from wood or other surfaces, use a paint remover or a paint stripper.
Recommended Articles
 PAINTING
How to Pick Out a Paint Sprayer
If you have ever painted a house and used a roller or paintbrush, you know it's a long, tedious job, seemingly with no end in sight, especially if you have to do more than one coat. Enter the paint sp
SMALL-SPACES6 Ways to Make a Small House Feel Ten Times Larger, According to Designers
If you're a small space dweller, you know every square foot counts. And although it's impossible to actually make your home bigger without taking some major renovations, there are some key decorating
INTERIOR-DECORATINGI’ve Been Thrifting for Years—These Are the 6 Home Decor Gems I Never Skip
Key Points Repurpose thrifted items like crystal ashtrays and vintage glassware for style and function.Collect unique decor pieces such as bust sculptures and thrifted artwork to add personality.Stock
INTERIOR-REMODEL-AND-REPAIR4 Budget-Friendly Tips to Know Before Renovating Your Home, According to Home Experts
This story is a part of our Old House New Issue, where we explore why people are no longer moving in 2024, and how to renovate your current home to make it work for you. To learn more about where to s
HOME-IMPROVEMENTHow to Turn Off the Power to Your House
All homes have a main electrical service panel, a circuit breaker panel, or a fuse box in older homes. This panel receives power from the local electrical utility and sends it to the various branch ci
BATHROOM-REMODEL-AND-REPAIRThe Best 5x8 Bathroom Layouts to Save Space
While 5 by 8 feet may seem like a small size for a well-designed bathroom layout, it's actually the most common floor plan that can still encompass a sink, a shower and tub, and a toilet. That said, t
KITCHEN-REMODEL-AND-REPAIRWhat Does the Average 12x12 Kitchen Remodel Cost? A Complete Guide
Kitchens need to be functional but appliances can break down, cabinetry can sag, and doors or hardware may even come off entirely. While quick fixes can help for a time, you may want to consider plann
KITCHEN-REMODEL-AND-REPAIRHow Much Does a 10x10 Kitchen Remodel Really Cost?
A 10x10 kitchen remodel costs an average of about $24,000. Depending on the grade of materials you choose, it can cost anywhere from $15,000 to $50,000. A 10x10 kitchen is a standard size in many home